Home DIY: Building a Fireplace Mantel
/
One of the projects that made the biggest impact on our home was building a mantel for the fireplace. I grew up in a home with a fireplace and it was something that was on my short wish list when we went house shopping over two years ago.
After moving in we found that there was a loose wooden board resting on top of the fireplace face. It wasn’t stable and it looked unsightly. As we thought about options for fixing this design element our first lofty ideas were quickly amended as the costs of the project began to add up.
The Before


Similar to our shared office, we started with a room that was not great. I found these photos from the original listing of our house and you can see the rather neon canvas that we were working with! The lime green paint was an eyesore, and while the previous owners may have tried to use it as a dining room at one point, it felt more like a living room to us. As we thought about the function and design of the fireplace and mantel in this room, there were a couple of things that were high on our list of priorities for this project:
1. The mantel needed to mimic the existing woodwork throughout the house.
2. The overall design needed to allow for adding hard-wired sconces.
3. The brick itself of the fireplace needed to be painted.
During


We started off by framing out the existing piece of wood (which we found out was a piece of an old door) atop the fireplace. It was a great way to limit our waste and project costs, and gave us an overall size for the mantel that we knew would work. After framing the existing piece, we added additional wood on top to extend the sides and front, and then crown moulding around the front and sides.
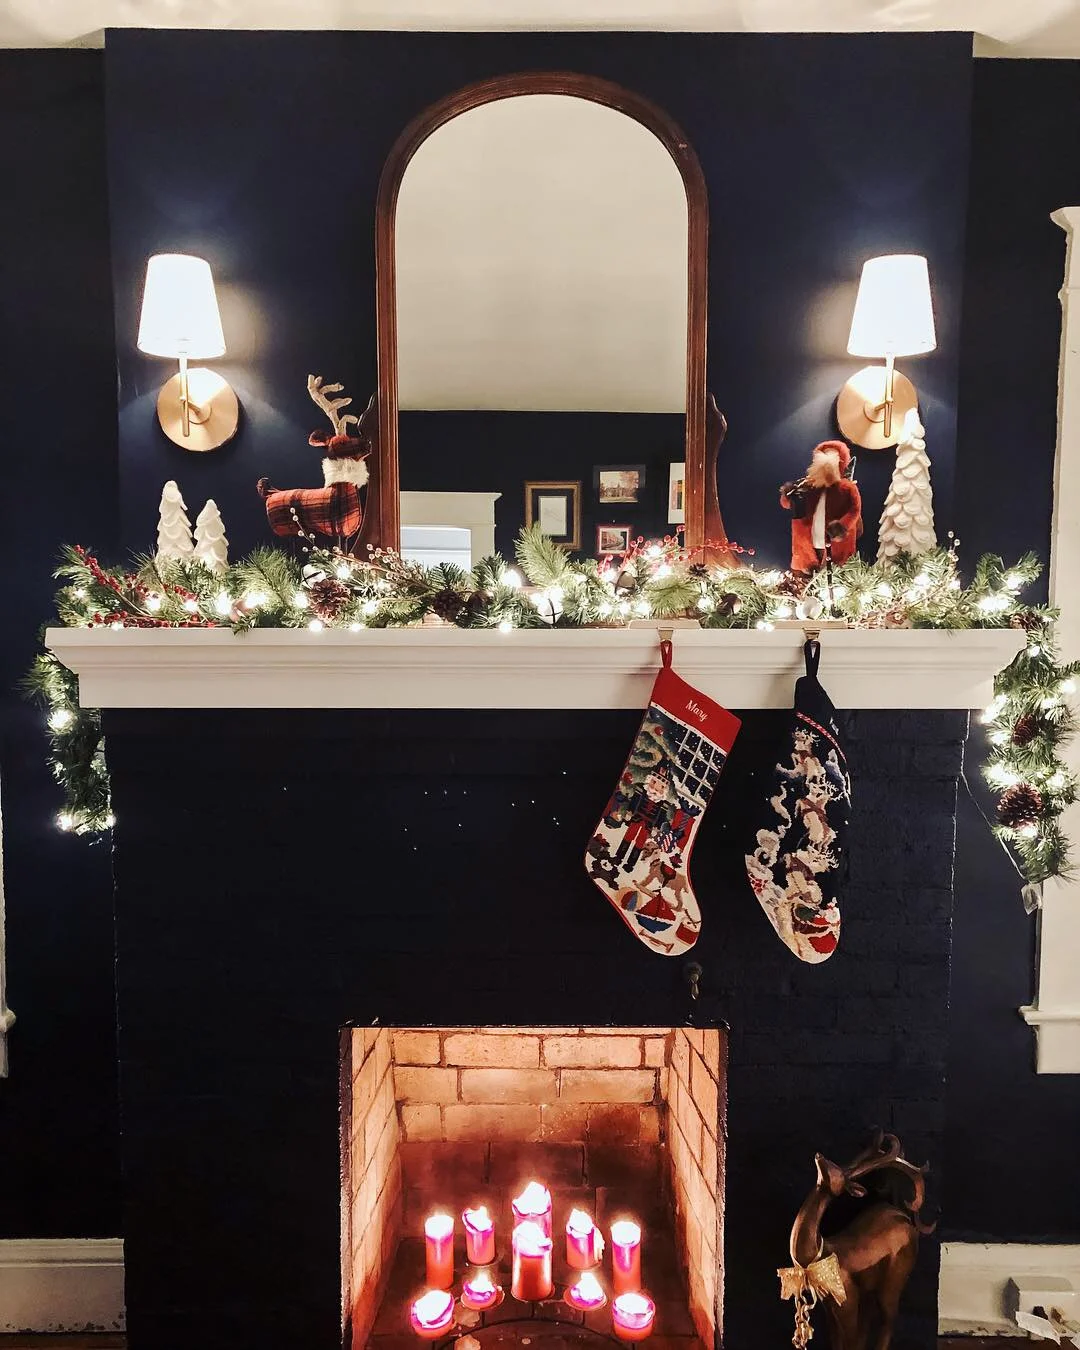
Our original plan was to paint the fireplace and mantel white to add some contrast in the room but after one coat of white paint we were not at all pleased with how it looked. So we regrouped and pulled out the navy paint we had leftover and gave it a quick coat. You can see that we’ve stuck with it, and I’m so happy with the final result! The fireplace blends so much better than it did when it was unpainted brick, and the white mantel helps to provide interest and contrast as a focal point in the room.
After the mantel and fireplace were finished and painted, we had to frame out the wall above the mantel so we could wire and attach the sconces. We actually purchased these sconces over a year before starting this project and just hung on to them until the time was right! If there is one tip I can offer about DIY home renovations on a budget it’s to shop sales whenever you have the chance. Once you have a vision for what you want the finished product to be, you can really take advantage of sales throughout the year until you’re ready to actually begin the work!
One of the difficult parts of doing work in a 90+ year old home is that the plaster walls are a little wobbly and very thick. So it makes attaching things to the walls very tricky. We used a piece of leftover drywall from another project to finish the wall and painted everything navy to match the rest of the room. Looking at it now, it seems like it’s always been there, and I sometimes forget where we started!
This room was another great opportunity for Kurt and I to learn and practice a number of new skills. In addition to working with drywall again, we also learned how to prep a fireplace to be painted and how to split power and add two completely new dimming light fixtures!
The After

We finished the project last year just in time to decorate for the holidays and let me tell you, adding garland and lights was just magical. The mirror is another of my favorite elements of this project - the frame was a great find during our neighborhood’s annual community yard sale that we got for free! My mom helped us get a new mirror cut for the frame and it looks like it was always meant to be there.
Having lived with the project completed for almost a year, I am still sometimes amazed at how everything came together to transform the room. It’s not completely perfect, but I’m learning that with these DIY renovation projects that Kurt and I are doing, perfect isn’t always necessary. Our home is old and worn in, and sometimes a little imperfection helps me to forget what is newly added and what is original!
Want some more ideas for how you can make an impact with your fireplace? Click here for budget-friendly suggestions!

Here are some of the specifics about our paint color and decor elements:
Paint Color: Old Navy by Benjamin Moore
Sconces: West Elm
Wood and other supplies: Home Depot
Mirror frame: College Hill Neighborhood Yard Sale find
Mirror glass: Bethlehem Glass Works