Home DIY: Installing a stair runner
/
Over the weekend we completed our latest home DIY project - installing a runner on our staircase! After we had our hardwood floors refinished in April, we realized how much our dog Sydney relied on the old carpeting to help her get up and down the stairs more easily. And at almost 13 years old with arthritis in most of her joints now, she certainly needs that help!
After doing a bit of searching online for stair runner options, I found this step by step stair runner installation tutorial. We had most of the tools we needed to execute the steps already, and I really liked the idea of doing this ourselves so we could be a bit picky with the actual rugs we used. I remembered seeing another blogger (Liz from Hello Adams Family) share a similar post from when they used Annie Selke rugs to DIY their own stair runner a couple of years ago, so I was confident that we could find something that would work for us as well!

After the risers and trim were painted
After looking a few different retailer options, we purchased a few rug samples from Annie Selke to narrow down our choices. And as it often goes, the sample rug we liked the least right out of the box ended up being the one that we loved the most after spending a few weeks looking at them all in our home! The Marled Indigo Woven Cotton runner rugs that we chose are a beautiful neutral pattern that goes really well with the grey and blue shades throughout our home. We purchased four eight-foot runner rugs just to be safe, but only ended up using three of the rugs to cover our stairs. We’ve used the fourth as a runner down our upstairs hallway to tie everything together!
The whole project of installing the stair runner took us about six hours from start to finish, not counting the time we spent to paint the risers on the stairs and touch up the trim paint a couple of days ahead of time. In terms of the installation, Kurt did the stapling while I tried to keep things tight and straight. There were a few times we had to adjust for wiggles in the rug lines, but overall we’re so happy with how the finished project turned out!

Our Newly installed stair runner
One thing that we had to adjust for in the steps of the tutorial was that we have a landing on our stairs and the tutorial isn’t written to include one. We ended up overlapping two of the rugs on the landing - the one coming down the stairs tucks underneath the one that starts at the back of the landing and continues down the remaining stairs to the first floor. The pattern of the rug we chose actually hides where the two rugs meet really well, and it made for an easy solution to what could have been a complex problem!
Here are the supplies that we used to complete the project. I’ve also included information about the paint colors we used on the walls and the trim in case you were curious! You can follow the steps outlined in the tutorial - it’s exactly what we did!
Supplies
Stair runner rugs of your choice; be sure to measure your stairs first to determine the total length you need to cover!
Rug pads; you can either use runner rug pads or get a larger rug pad and cut it into smaller pieces. Either way you’ll need to cut rug pads to the size of your stair treads.
Fabric scissors
Pneumatic staple gun; we purchased this one which connects directly to the air compressor we already had from other projects, like our home office update!
Tape measure
Double-stick carpet tape
Pencil
Marker
Bolster chisel; this tool helps to make sure the rugs are pulled tightly before you staple them into the stairs
Wall paint color - Old Navy by Benjamin Moore
Trim and riser paint color - Chantilly Lace by Benjamin Moore
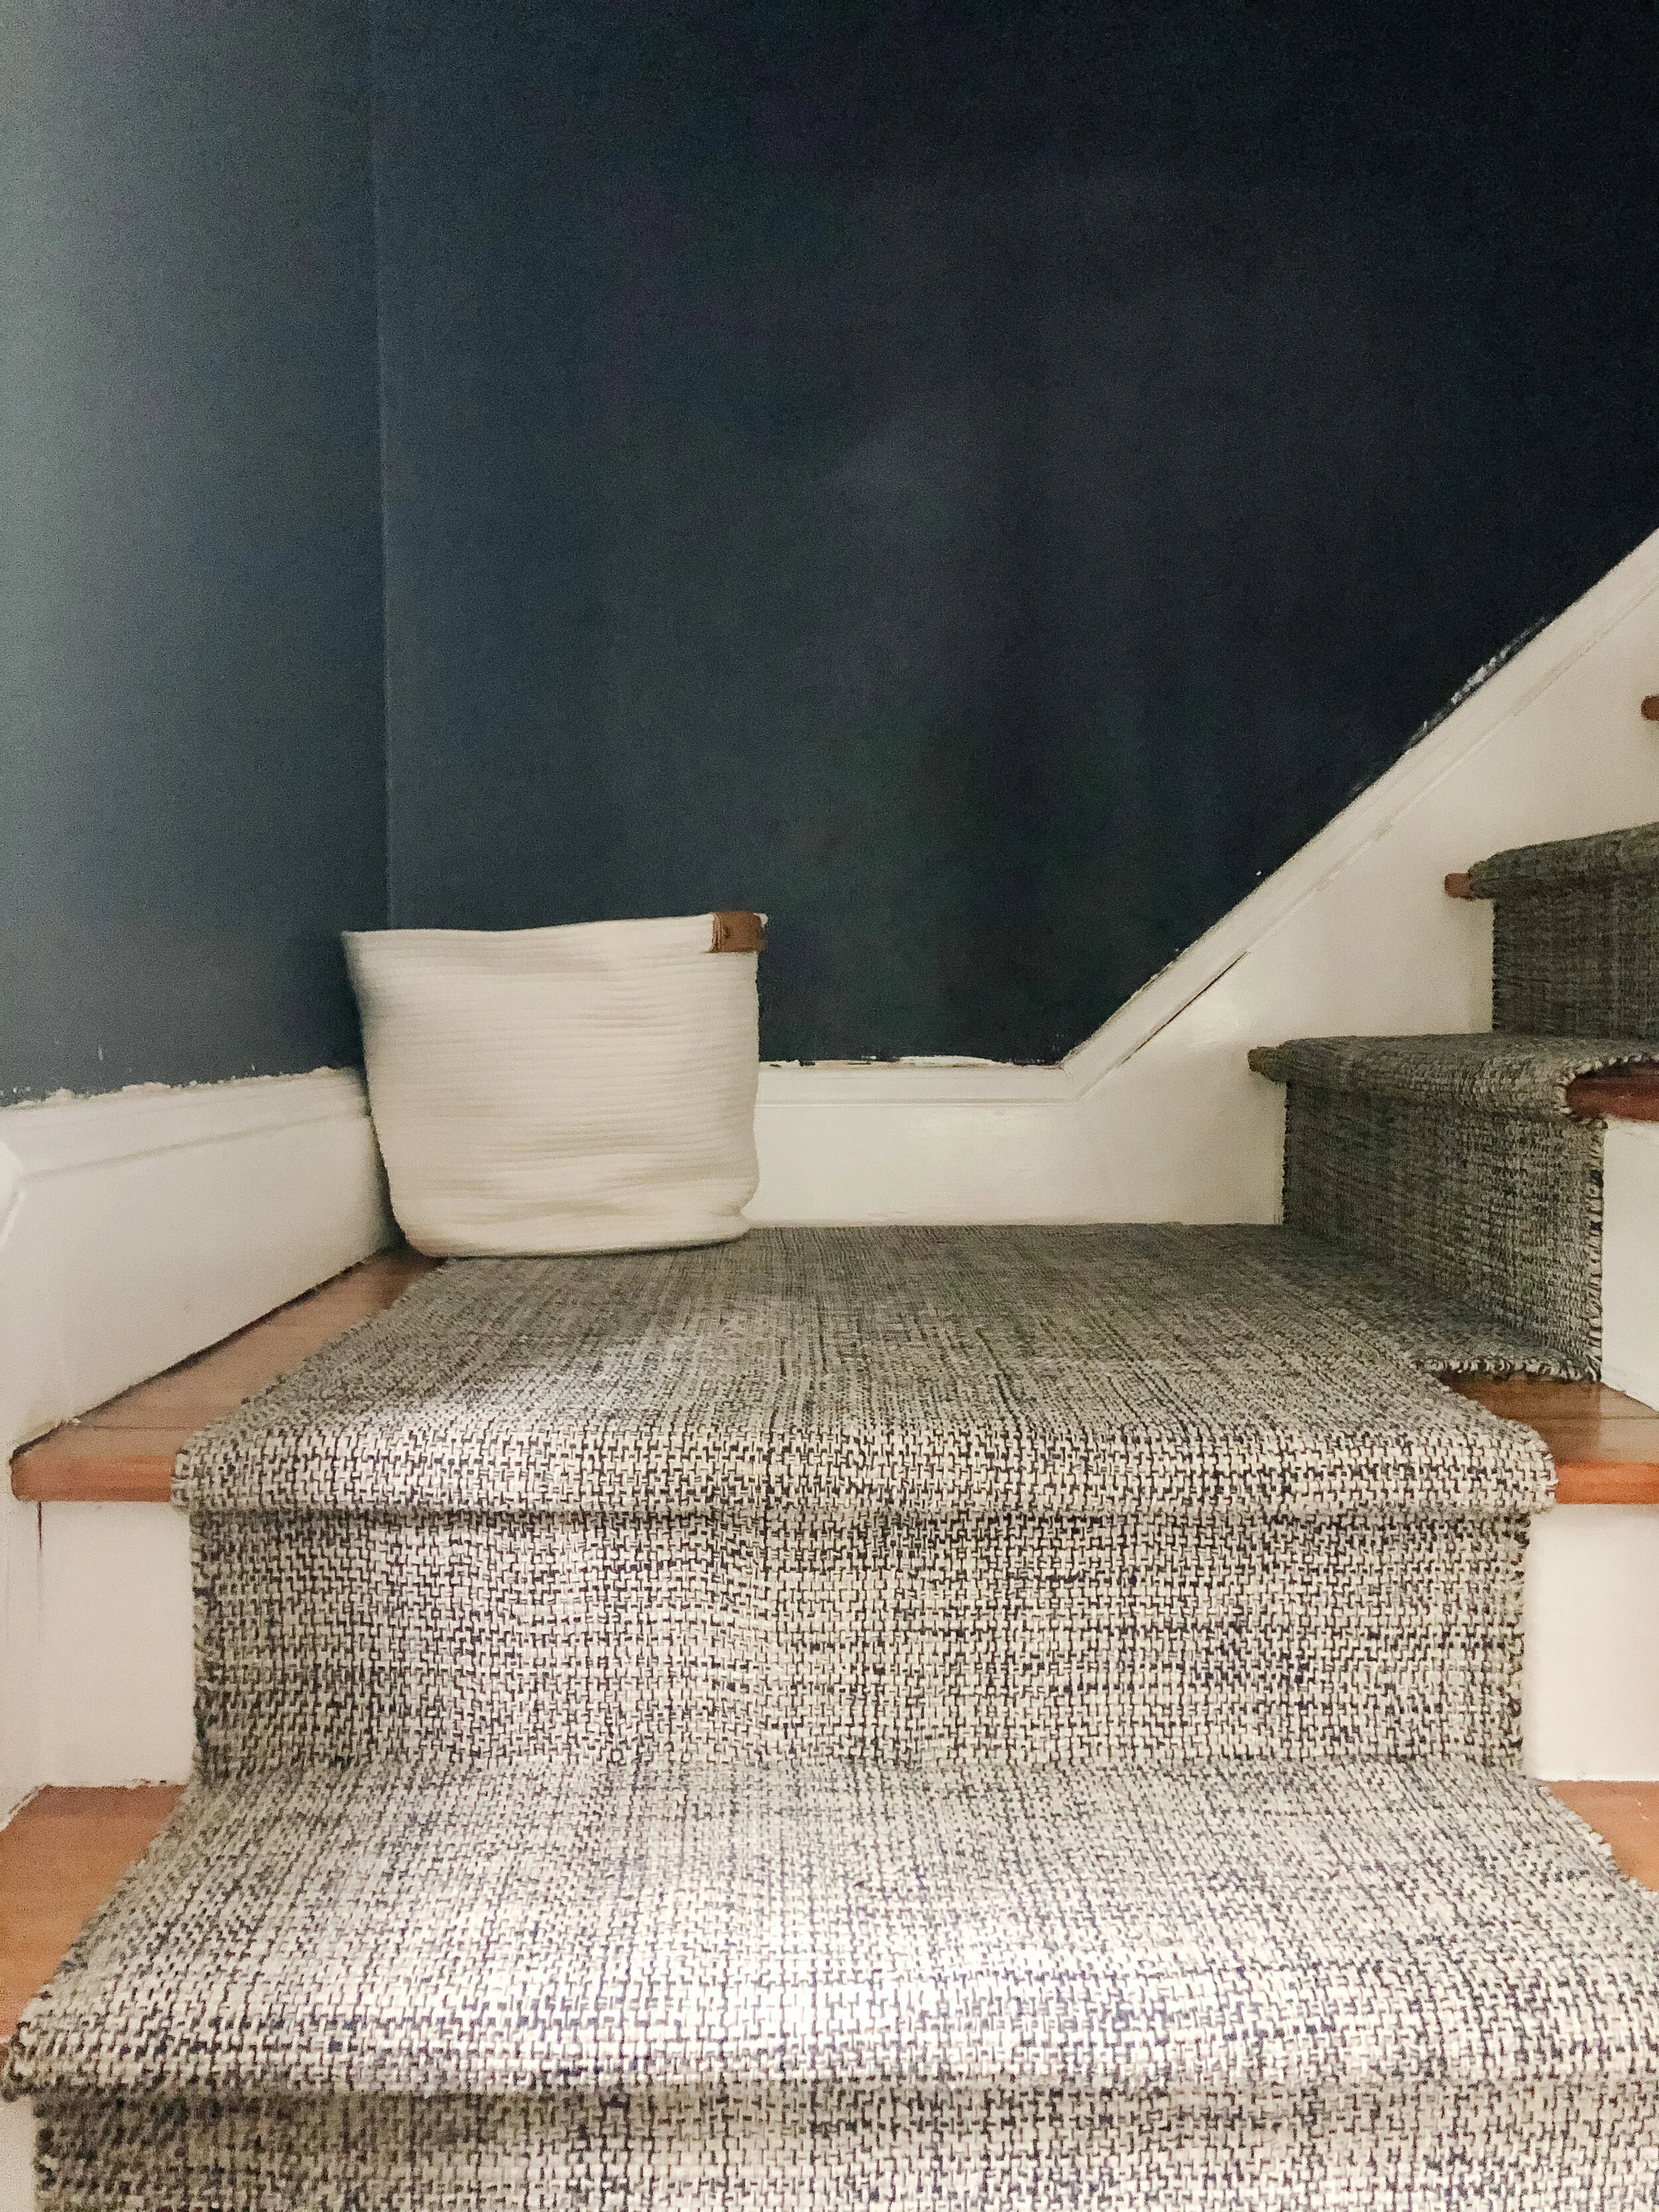
We use a catch-all basket at the bottom of the stairs to help gather things that need to go up to be put away each night. This one is from Target and is a great size!
We still need to touch up some of the trim and wall paint, but this is certainly one of my favorite home projects that we’ve completed to date! It’s funny how something as simple as a soft rug under your feet can help you feel more comfortable in your home. And I’m happy to share that Sydney really likes the results of this project too! She was up and down the stairs a few times after we finished putting the last staples in, and now even a few days later it’s easy to see how much more confident she is going up and down the stairs. Here’s to doing DIY projects just for our pets!