Floral DIY: Thanksgiving Centerpieces
/
One of the parts of owning our own home that I have loved the most is getting to expand my gardening and floral knowledge. When I was a senior in college, trying to figure out what the heck to do with my life, an advisor of mine had me take a career aptitude test. The results? That I should be a paralegal or a floral designer... not exactly what my parents had in mind after four years of a private, liberal arts education! But friends, I’d be lying if I didn’t say how much I love being creative in this way! Learning how to grow and arrange flowers has been such a nice way to calm my mind and take some time to appreciate something beautiful.
A common rule of thumb that I’ve learned to use when designing pots and planters in my garden is to employ thrillers, fillers, and spillers in the design. After playing around a bit with arrangements for our home, I have found the same rule can apply as well with cut flowers! Here’s what I mean:
Thrillers
These flowers are the star of your arrangement. They might be your largest blooms, or the ones with the brightest colors. In general, thrillers are the flowers that you should be choosing first and then building your arrangement around. In planted containers, thrillers are often the tallest plants, but I don’t think that needs to necessarily be the same when building out a cut flower arrangement.
Fillers
Fillers help add volume to your arrangements. These are flowers that you can surround your thrillers with, and help add overall visual interest in your vase. They might be things that add textural or color contrasts to your thriller, and they also can help to hide the stems of taller plants in the arrangement. When building your arrangements you don’t need to stick to just one filler - I like to use both foliage and flowers in this role!
Spillers
Spillers are plants that will trail over the edges of your vase or container, helping to add movement and anchor the overall floral design. They are another chance to help add visual contrast and soften your arrangement. When planting in an actual container spillers are often added at the end, but I like to use them closer to the beginning of building a cut flower arrangement so I have a base to build up from easily.
Once you have chosen your thrillers, fillers and spillers, you’re ready for the next step of building a good arrangement: choosing your vessel. You really don’t need anything special to hold your flowers - a regular cup or mug really will work just fine! But sometimes a nice vase just helps give an arrangement that little bit of extra oomph and interest in your space.
What you should keep in mind when choosing a vase is the shape and height, and how it compares to the flowers you’re arranging. For example, if you’re arranging tall, flowering branches, something that is wider at the bottom and narrower at the top will help ensure your branches have space to spread out a bit without drooping to the side too much. A good guide to keep in mind when choosing the right vase is making sure your flower stems are about 1.5 to 2 times the height of the vase. That will allow you to get some good height and width to your arrangements while also making sure that the flowers have enough support.
After you’ve chosen your vase, it’s time to start arranging! Here are a few more tips to keep in mind:
Be sure to remove all of the leaves that will fall below the neck of your vase. This will help prevent bacteria from growing in your water and will also help the overall arrangement look cleaner from the start.
Cut your stems at an angle and make sure you use a sharp knife or pair of floral shears. Regular scissors can crush your stems and prevent them from being able to get enough water.
Start by placing your first few stems in your vase in an “X” formation, both in an east and west direction and in a north and south direction. This helps set a base for the other stems to have support as they are placed.
As you work, be sure to look at your arrangement from all angles checking that flowers are evenly spaced and that there aren’t any large holes. Think about too where you’re going to place your arrangement when it’s done - will it need to be seen from all sides? Or can you designate one side the “back” and put it against a wall? You might need to rearrange things a few times, but that’s part of the fun!
Depending on your chosen vase, things like floral foam, a floral frog, or clear tape across the top of the vase will all help your flower stems stay where you place them. They aren’t always necessary though, so don’t be afraid to try building an arrangement without them!
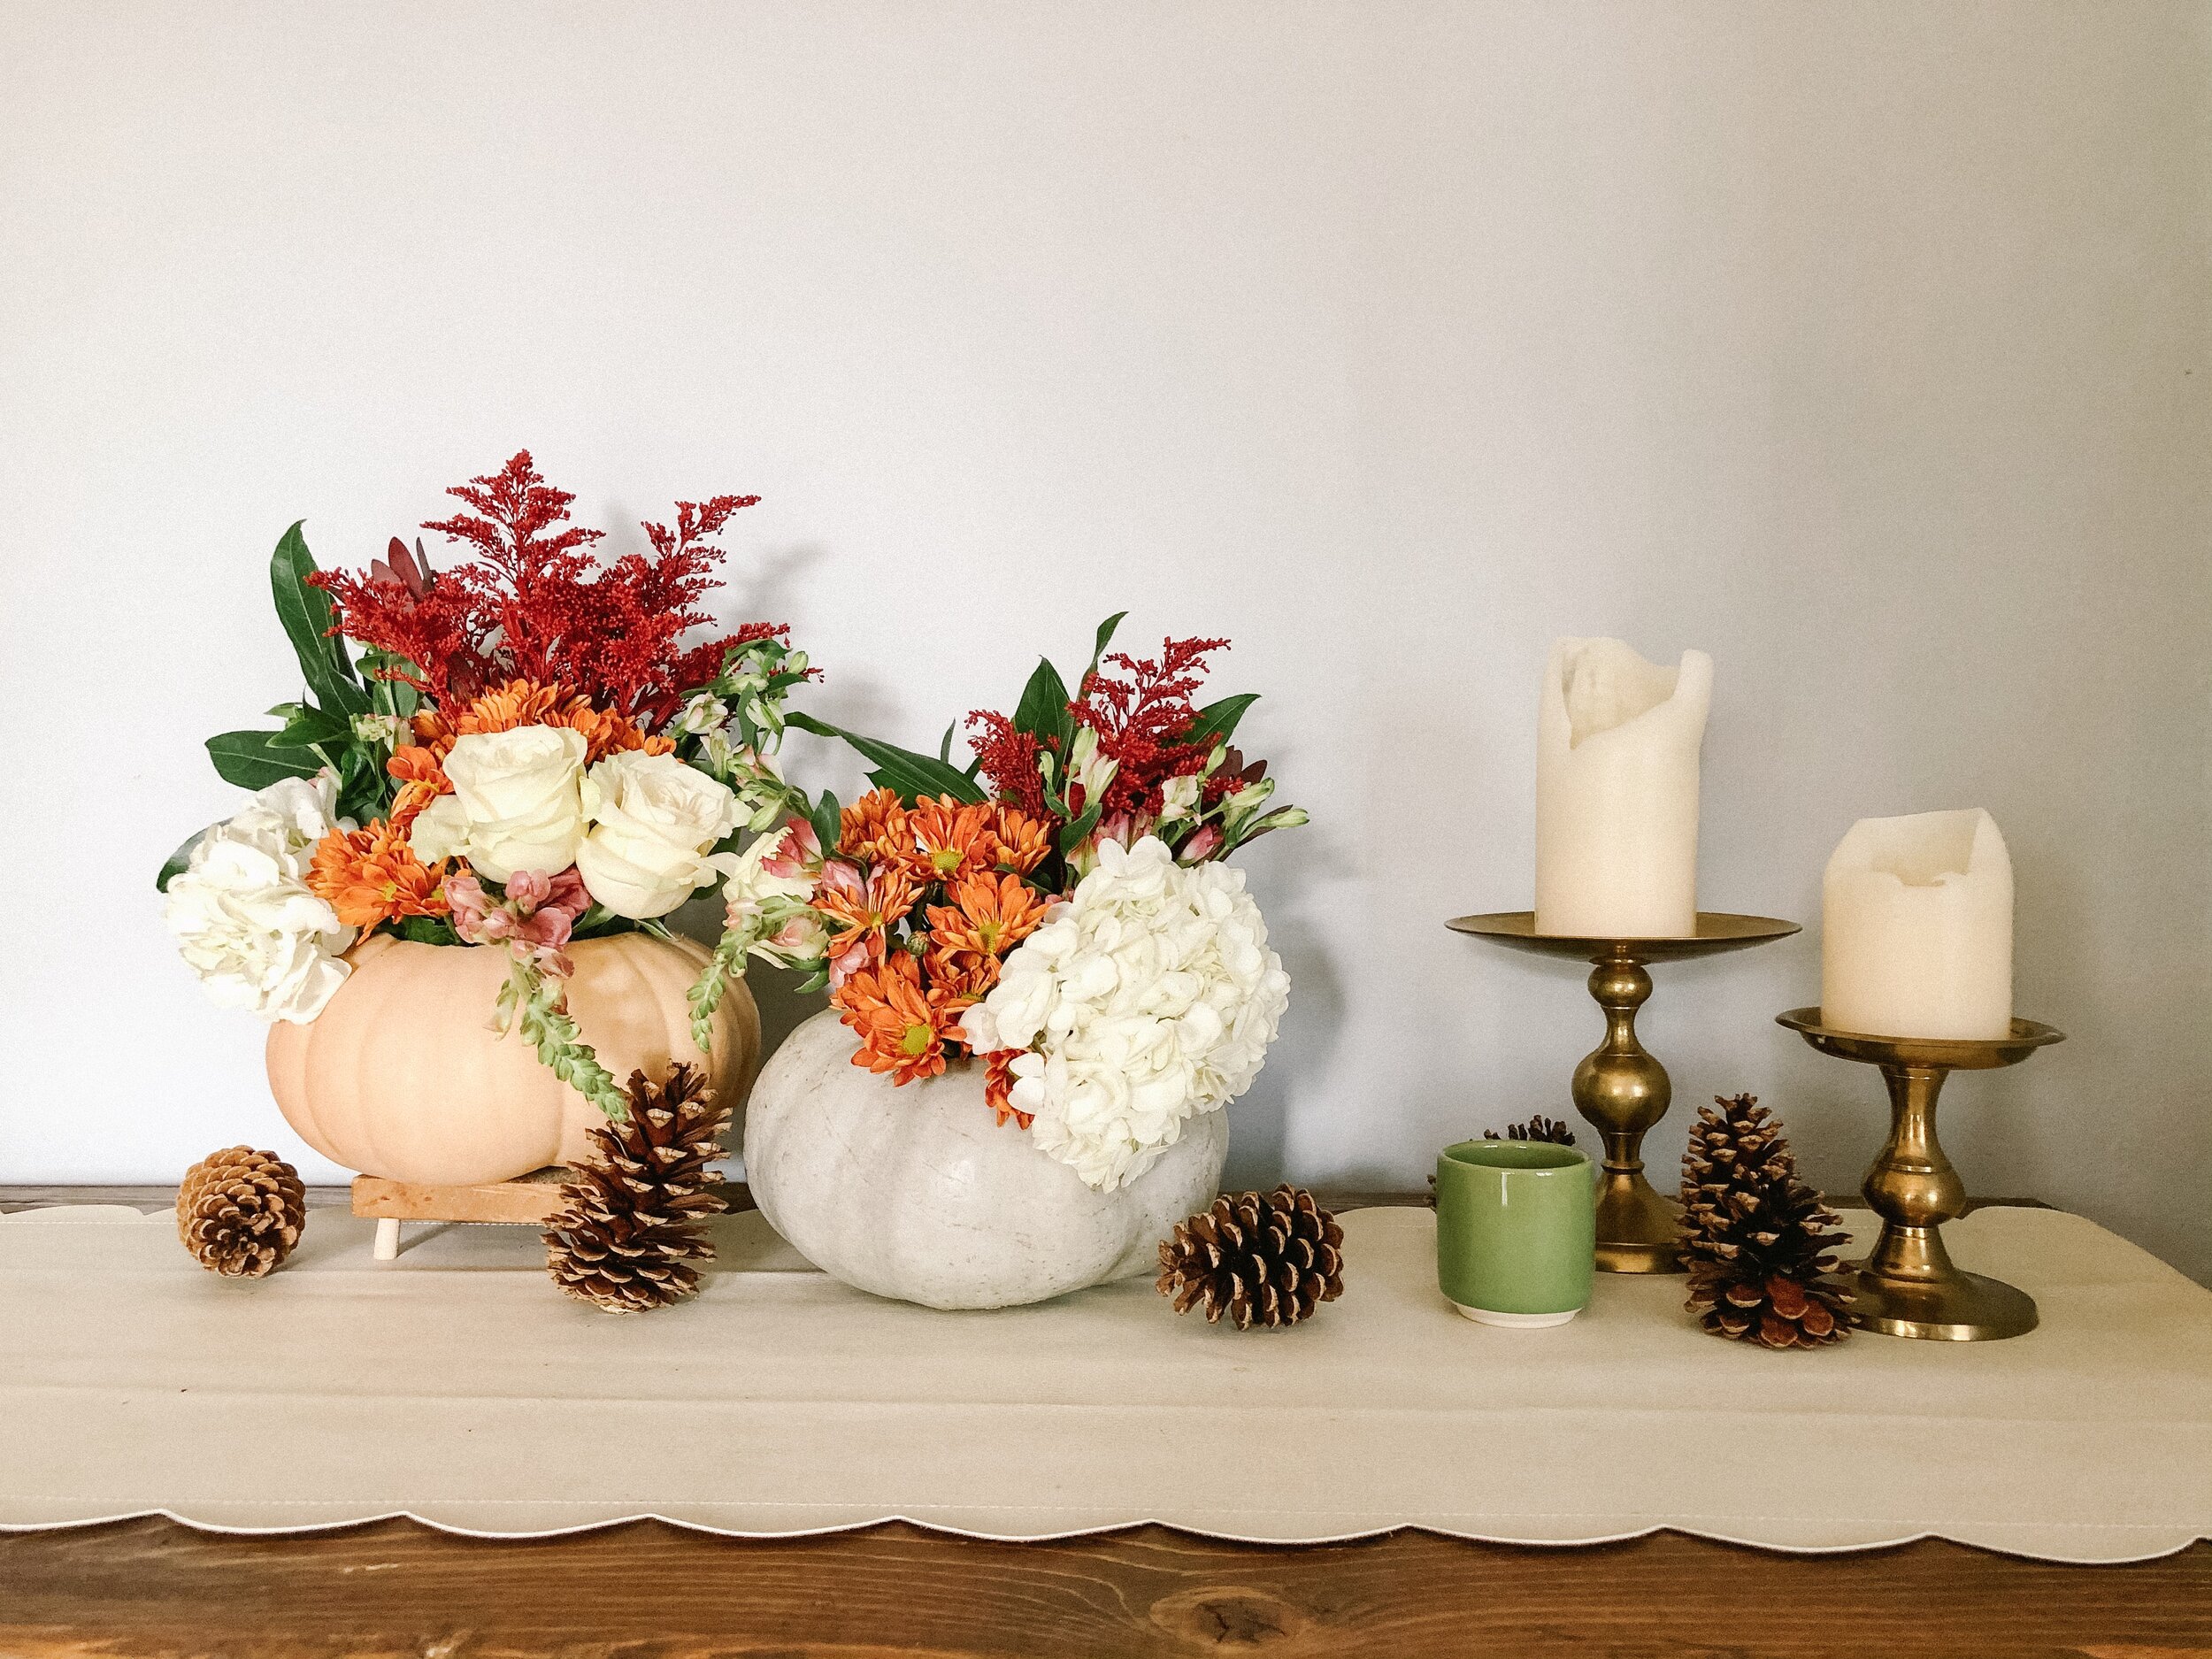
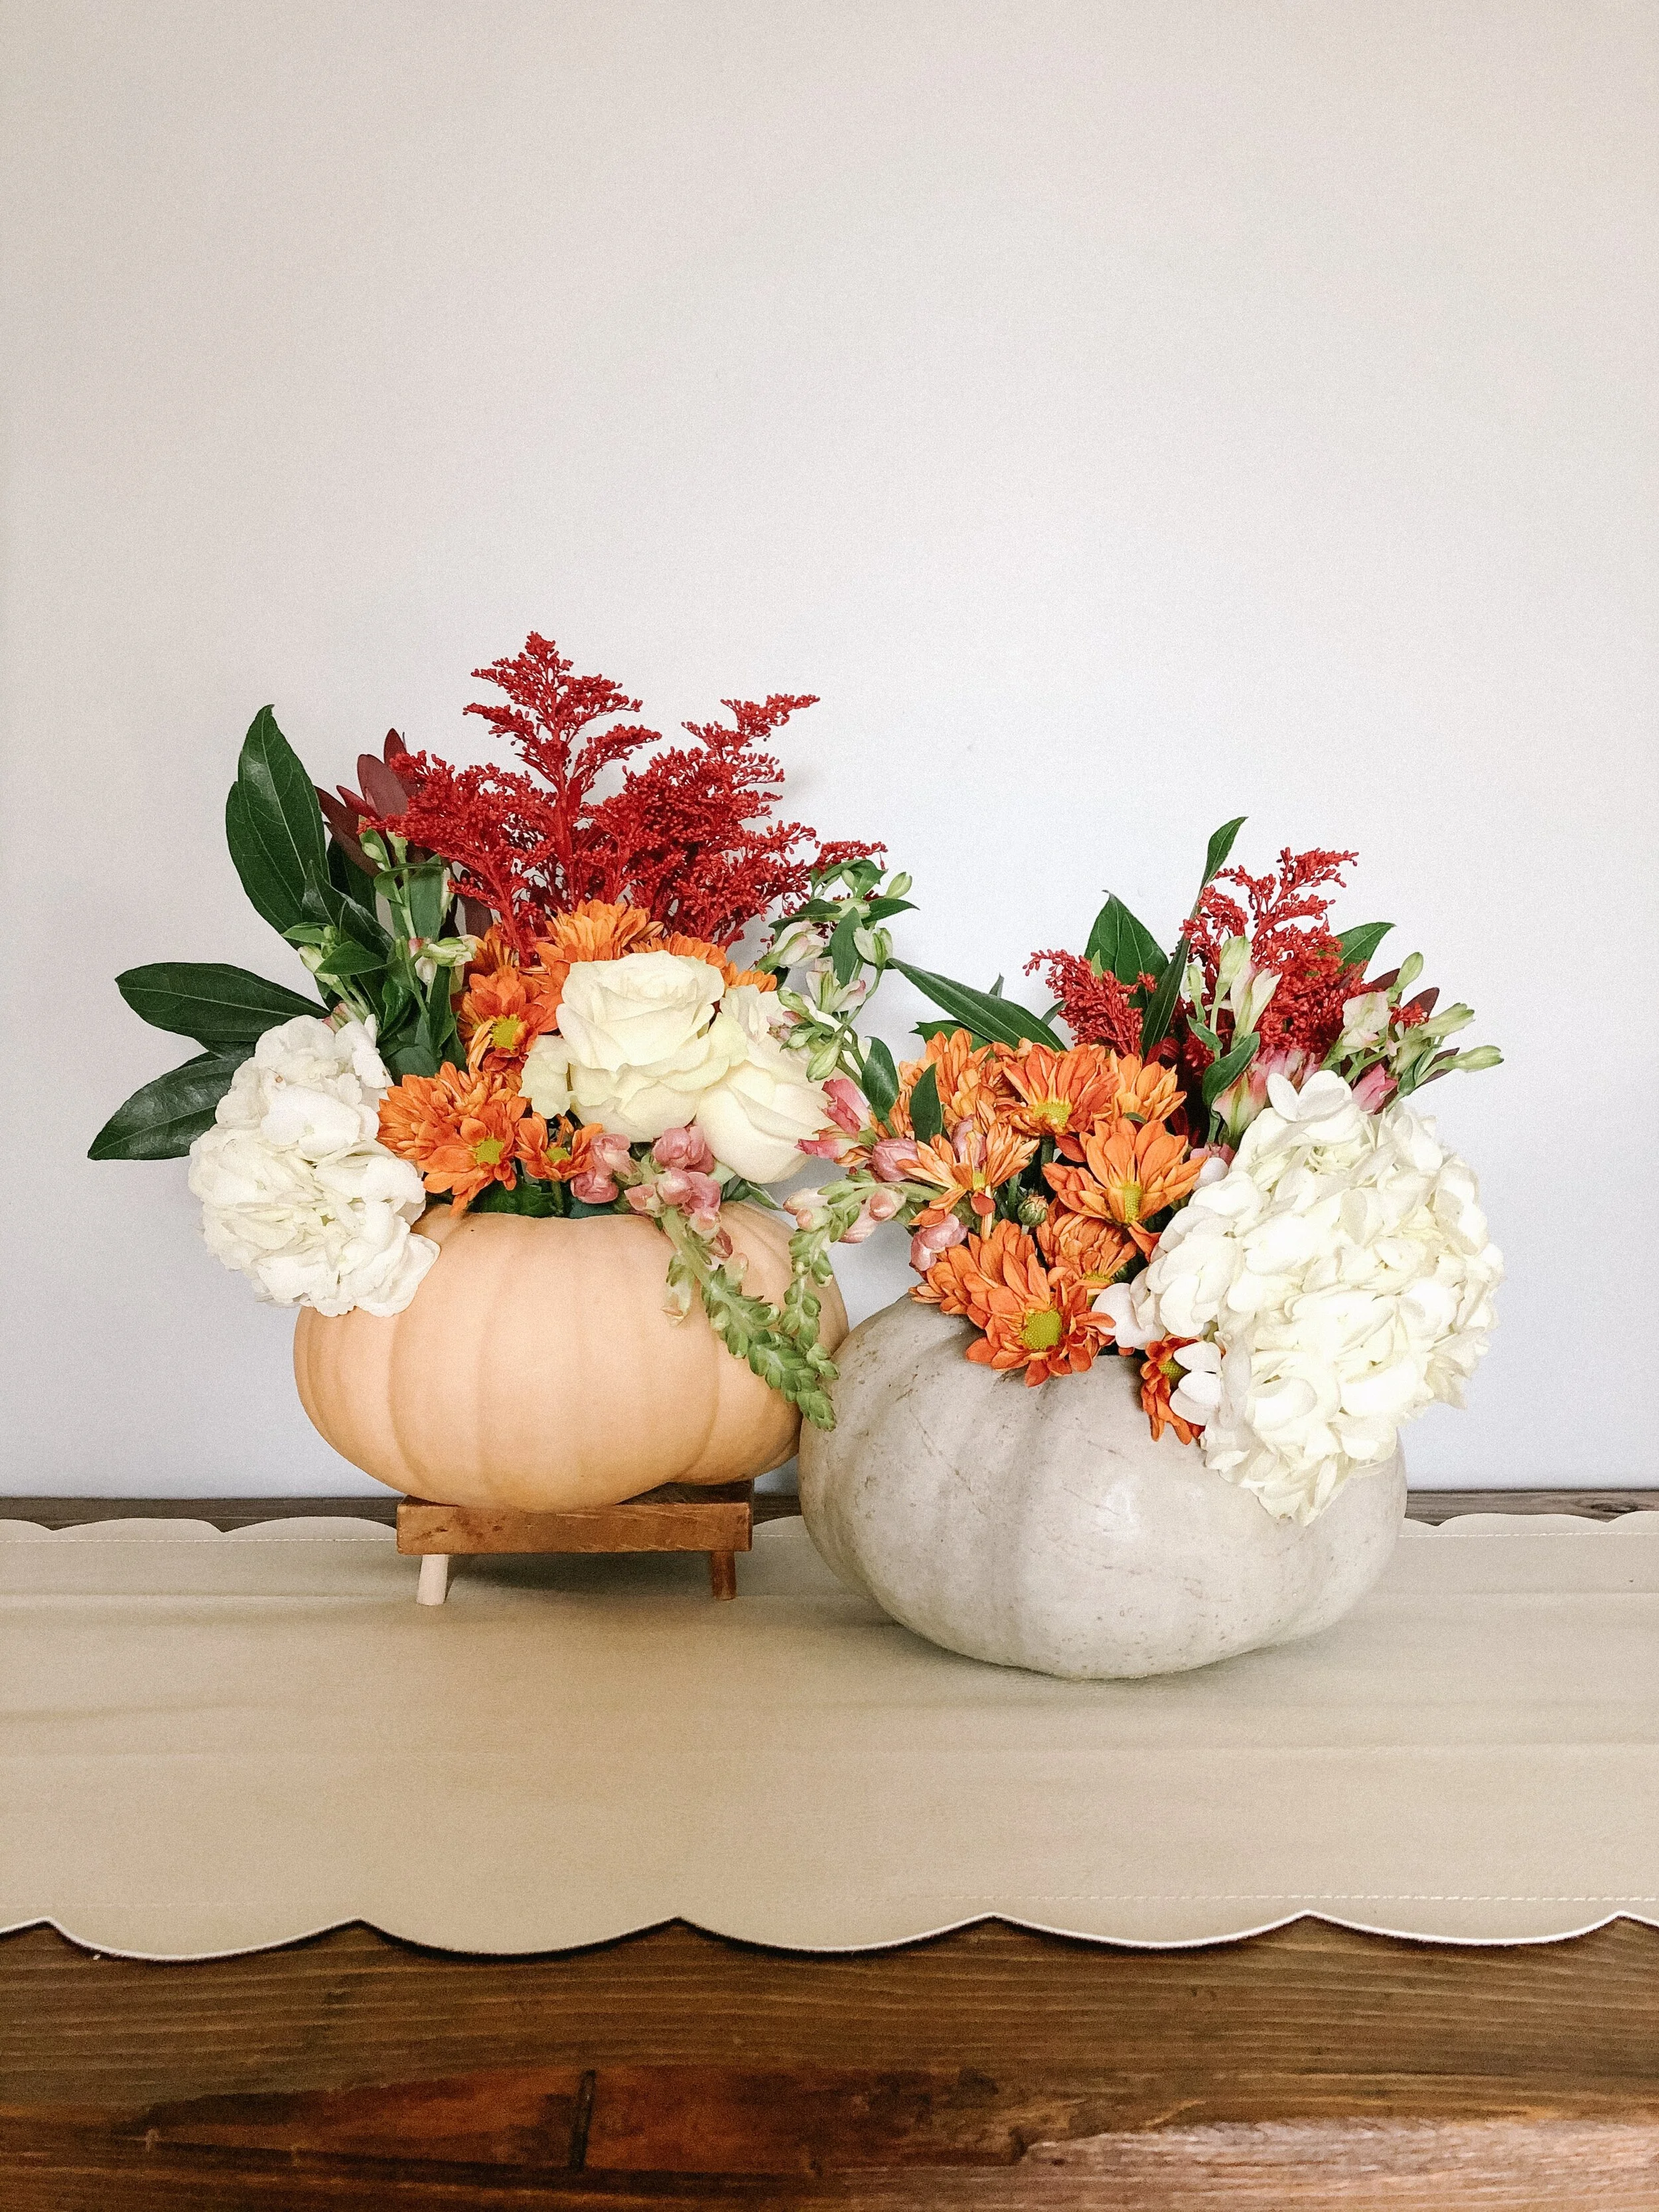
Now, let’s practice! Here’s how I used these tips to build out an autumn arrangement using flowers from our local grocery store. To make the arrangements a bit more special, and perfect to use as a Thanksgiving centerpiece, I chose to use pumpkins that we had displayed on our front porch!
Supplies:
One large mixed bouquet from the local grocery store
Decorative pumpkins, hollowed and cleaned out
Floral foam
Floral shears
With my supplies assembled, first I soaked my floral foam and inserted it into each of the pumpkins. Next, I laid out my flowers and greenery into their three categories - thrillers, fillers, and spillers.

I placed the spillers - in this case the hydrangeas and foxglove - into each pumpkin first so they could help serve as a base for the rest of the stems. Then I continued placing my filler stems - the mums, roses, and greenery - cleaning off foliage and trimming the stems to the correct length as I went. Finally, I placed my thrillers at the end.
I love how the colors of the pumpkins compliment the colors of the flowers in these arrangements! We won’t be hosting Thanksgiving this year, so I’ve placed these in our front entry to enjoy. With a few candles and scented pine cones, we’re ready to welcome in this holiday season!